Setting up a Cisco Access Server
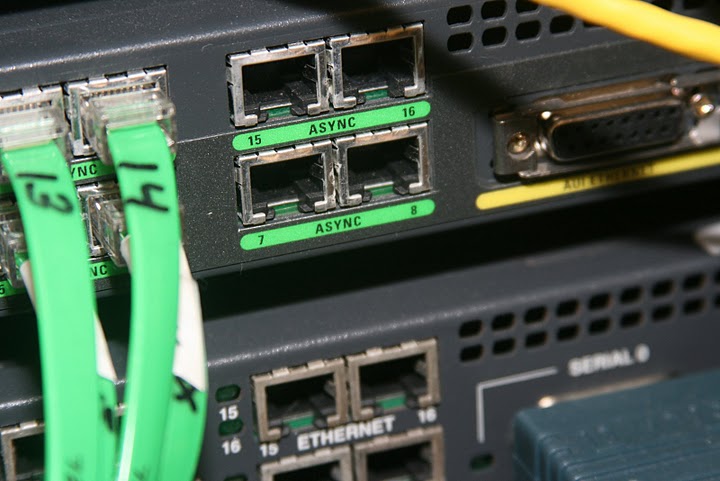
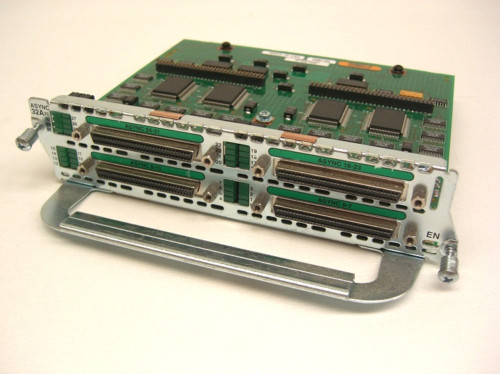
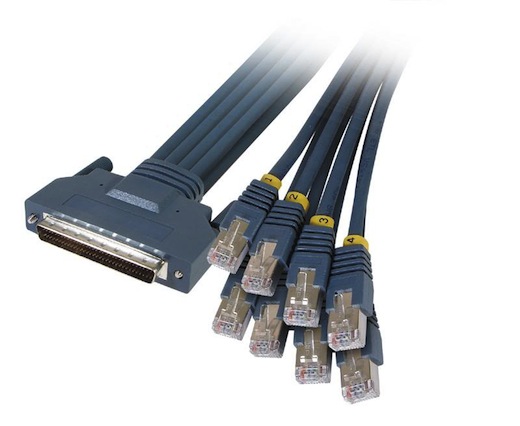
Whether your networking lab has 3 devices or 30 an access server, also commonly called a terminal server, is the vital connection between you and those devices. For this purpose most engineers use routers with asynchronous serial ports to connect to console (serial) ports on other devices. There are a couple of ways this can be accomplished as these ports can be found on a few devices and line cards. One of the popular methods is to use older Cisco 2509/2511 routers with either asynchronous RJ45 ports, or a 68 pin SCSI II interface that uses a cable called a cab-octal, giving you 8 ports per interface. Another popular method seems to be the NM-32A network module which offers 32 async interfaces. See the following images for a depiction of each.
How does all of this work?
Our Cisco router assigns port numbers to each serial interface connected to it. We can use these to communicate directly with each line. For example, on the 16 port Cisco 2511, these port numbers are 2001 – 2016. We reference these on the router using a static host configuration. The IP address specified can either be an interface IP, or a loopback address. When using other hardware, such as the NM-32a, your port numbers may change depending on which slot you use on the router. One method of determining your port numbers is to issue a show line command on your access server. As you can see below, the lines may not always be 1-32, or 1-16. As shown below, this server uses lines 33-65, or port numbers 2033 through 2065.
AccessServer#show line
Tty Typ Tx/Rx A Modem Roty AccO AccI Uses Noise Overruns Int
* 0 CTY - - - - - 0 0 0/0 -
33 TTY 9600/9600 - - 1 - - 2 0 0/0 -
34 TTY 9600/9600 - - 2 - - 1 37 0/0 -
35 TTY 9600/9600 - - 3 - - 0 148 0/0 -
36 TTY 9600/9600 - - 4 - - 0 149 0/0 -
37 TTY 9600/9600 - - 5 - - 0 172 0/0 -
38 TTY 9600/9600 - - 6 - - 0 199 0/0 -
< .... SNIP .... >
61 TTY 9600/9600 - - 29 - - 0 0 0/0 -
62 TTY 9600/9600 - - 30 - - 0 0 0/0 -
63 TTY 9600/9600 - - 31 - - 0 0 0/0 -
64 TTY 9600/9600 - - 32 - - 0 0 0/0 -
65 AUX 9600/9600 - - - - - 0 0 0/0 -
66 VTY - - - - - 2 0 0/0 -
67 VTY - - - - - 0 0 0/0 -
68 VTY - - - - - 0 0 0/0 -
69 VTY - - - - - 0 0 0/0 -
70 VTY - - - - - 0 0 0/0 -

Line(s) not in async mode -or- with no hardware support:
1-32
Configuration
After figuring ouch which ports are going to go to which device we can start generating a configuration. First we’re going to configure our serial lines to allow us to connect to them via telnet, then configure the no exec option (While far from being mandatory, it will certainly help you from becoming locked out of a line). We’re also going to use exec-timeout 0 0 to prevent our sessions from disconnecting us when idle.
AS(config)#line 1 16
AS(config-line)#transport input telnet
AS(config-line)#no exec
AS(config-line)#exec-timeout 0 0
Now we can move on to our host configuration. In this case we’re going to use a loopback interface on the device to “talk” with.
AS(config)#interface lo0
AS(config-if)#ip address 10.0.0.1 255.255.255.255
AS(config-if)#exit
AS(config)#ip host r1 2001 10.0.0.1
AS(config)#ip host r2 2002 10.0.0.1
AS(config)#ip host r3 2003 10.0.0.1
AS(config)#ip host r4 2004 10.0.0.1
AS(config)#ip host r5 2005 10.0.0.1
AS(config)#ip host r6 2006 10.0.0.1
AS(config)#ip host sw1 2007 10.0.0.1
AS(config)#ip host sw2 2008 10.0.0.1
A complete, working example configuration.
AS#sh run
Building configuration...

Current configuration:
!
version 12.0
service timestamps debug uptime
service timestamps log uptime
no service password-encryption
!
hostname AS
!
!
ip subnet-zero
ip host r1 2001 10.0.0.1
ip host r2 2002 10.0.0.1
ip host r3 2003 10.0.0.1
ip host r4 2004 10.0.0.1
ip host r5 2005 10.0.0.1
ip host r6 2006 10.0.0.1
ip host sw1 2007 10.0.0.1
ip host sw2 2008 10.0.0.1
!
!
!
interface Loopback0
 ip address 10.0.0.1 255.255.255.0
 no ip directed-broadcast
!
interface Ethernet0
 ip address 192.168.88.23 255.255.255.0
 no ip directed-broadcast
 shutdown
!
interface Serial0
 no ip address
 no ip directed-broadcast
 no ip mroute-cache
 shutdown
!
ip classless
ip route 0.0.0.0 0.0.0.0 192.168.88.1
!
!
line con 0
 transport input none
line 1 16
 no exec
 exec-timeout 0 0
 transport input telnet
line aux 0
line vty 0 4
 login
!
end
Using the Access Server
Now that we’ve got things up and running, lets go over some of the basics of using our access server. The first thing you need to know is how to connect to your devices, right? Well, simply type in the name of the host we configured and you’ll be connected to that line.
AS#r1
Trying r1 (10.0.0.1, 2001)... Open

% Please answer ‘yes’ or ‘no’.

Would you like to enter the initial configuration dialog? [yes/no]:
To get back to your access server, use the Cisco escape sequence. Ctrl + Shift + 6 then X Now you’re able to clear that line. Use the command show sessions to see which lines are open, to clear them simply type clear line [line number]. ( You can also use the command disconnect [session number] to clear any open sessions. )
AS#show sessions
Conn Host                Address             Byte  Idle Conn Name
*  1 r1                  10.0.0.1               0     0 r1

AS#clear line 1
[confirm]
 [OK]
If you simply wish to switch back to that session, just type the connection number (at left) displayed in the show sessions output. ( Pressing enter on an empty line also resumes your most recent session. )
AS#show sessions
Conn Host                Address             Byte  Idle Conn Name
*  1 r1                  10.0.0.1               0     0 r1

AS#1
[Resuming connection 1 to r1 ... ]New posts in your inbox when they publish. No digest, no marketing.